
It's finally that time of year when everybody is excited to be done with the year! And, with the help of a couple of strong cocktails, optimistically look forward to the next year being better than the last.
I always firmly believe that New Year’s Eve is the best time to host a big dinner party, especially if you have never done it before. Everybody is in such high spirits and eager to dress up, that even if you might have a few kitchen mishaps, nobody will seem to notice or care.
Whether you are planning on staying at home or onboard to quietly ring in the New Year, or you just need to line your stomach before you get those dancing shoes on and hit the town till the sun comes up, this impressive-looking tropical-themed dinner party menu will hit all of the sophisticated New Year’s Eve notes. This dinner party menu might look fancy, but believe me, it’s still unbelievably quick and easy to make!
A last little fun fact about this dinner menu is that this is exactly what I made for some pretty high-profile guests onboard a superyacht in the Bahamas to ring in 2022 last New Year!
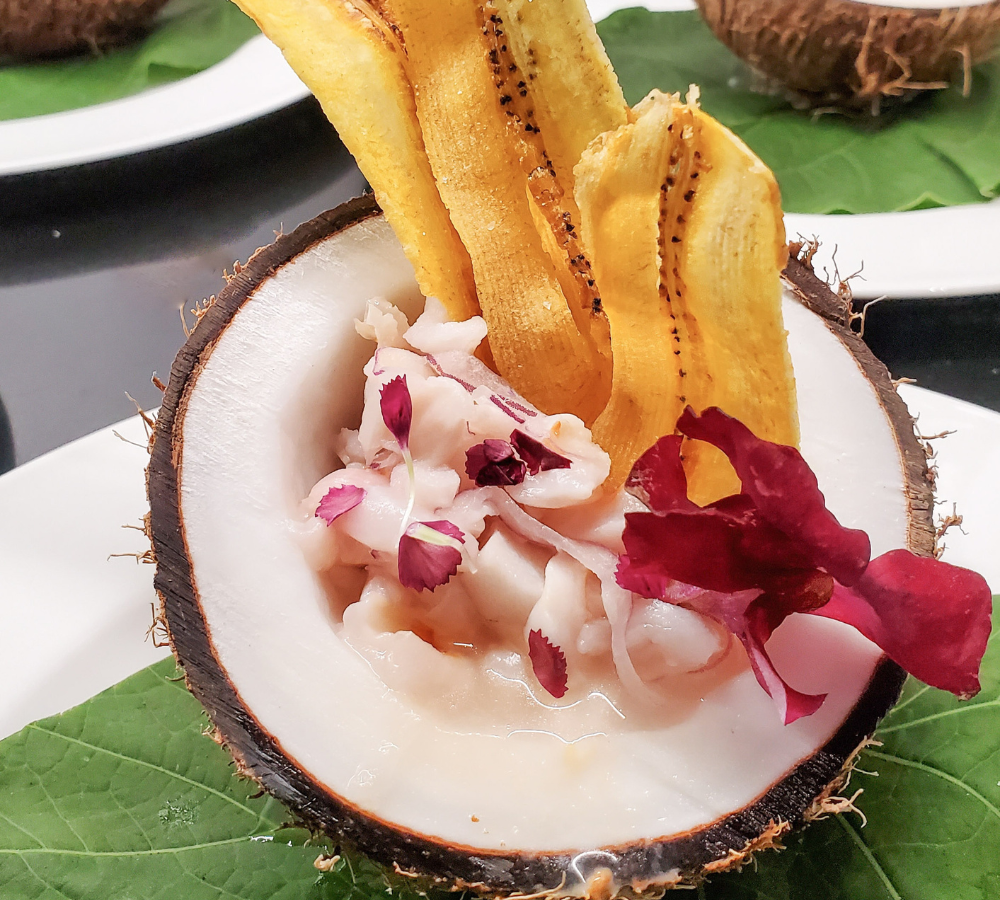
Lychee Ceviche with Crispy Plantain Chips (1-2)
Simple, fresh and sophisticated, this refreshing fruity ceviche hits all the elegant New Year’s Eve dinner party notes!
1. Ceviche
Serves 6 Appetizer Portions
- 1-pound red snapper, mahi-mahi or any fresh local white fish
- ½ cup fresh lime juice (about 5 limes)
- ½ cup fresh lemon juice (about 4 limes)
- 1 jalapeno or Fresno pepper, thinly sliced
- 1 can (20 oz) Lychee fruit *
- ½ cup thinly sliced red onion
- ½ cup packed fresh cilantro, roughly chopped
- 1 tsp freshly grated ginger
- 1 tsp fish sauce
- 2Tbsp reserved Lychee juice
- Flaked sea salt
- Fresh or brown coconuts chopped in half for serving, optional
2. Plantain Chips
- Very green unripe plantains *
- Flaked sea salt
- High-heat cooking oil for frying, like vegetable, canola or peanut
Method
For the ceviche, thinly slice the fish and sprinkle it with sea salt. Add the fish to a large sealable container or Ziploc bag. Pour in the fresh lime and lemon juice, jalapeno or Fresno pepper, thinly sliced Lychee, red onion, fish sauce, grated ginger and lychee juice. Refrigerate for at least 1 hour and up to 4 hours.
While the ceviche is marinating, prepare the plantain chips. Peel the plantains by using a knife and making long lengthwise slits all the way down each plantain. Peeling a plantain is absolutely not like peeling a banana!
Using a potato peeler or mandolin, thinly slice the plantains lengthwise. Run the peeler under water every couple of slices to make sure the plantain doesn’t get sticky and clog up the peeler. I don’t recommend using a knife to cut the plantains into thin strips, as the strips need to be pretty thin in order to fry up crispy.
Using a deep fryer, air fryer or a pot with oil on the stove (don’t attempt this whilst sailing!), heat up the oil until bubbles start slowly rising from the bottom and fry up the plantain chips in batches. They go pretty quickly, not more than 5 minutes total, so keep a constant eye on them!
Fry till crispy and lightly golden. Drain on a paper towel and sprinkle with sea salt.
When ready to serve, mix in fresh cilantro and add more salt or fish sauce to taste if needed. Serve in half a coconut or bowl of your choice, topped with some extra juice and plantain chips.
*Cans of Lychee are readily available at most grocery stores in the ethnic food aisle or in the canned fruit section
*It is essential to use very firm, unripe green plantains in order to make crispy plantain chips. Believe me. I have made the mistake more than once, thinking that I could get away with using slightly ripe plantains to make these. It ended up in a gigantic mushy mess!
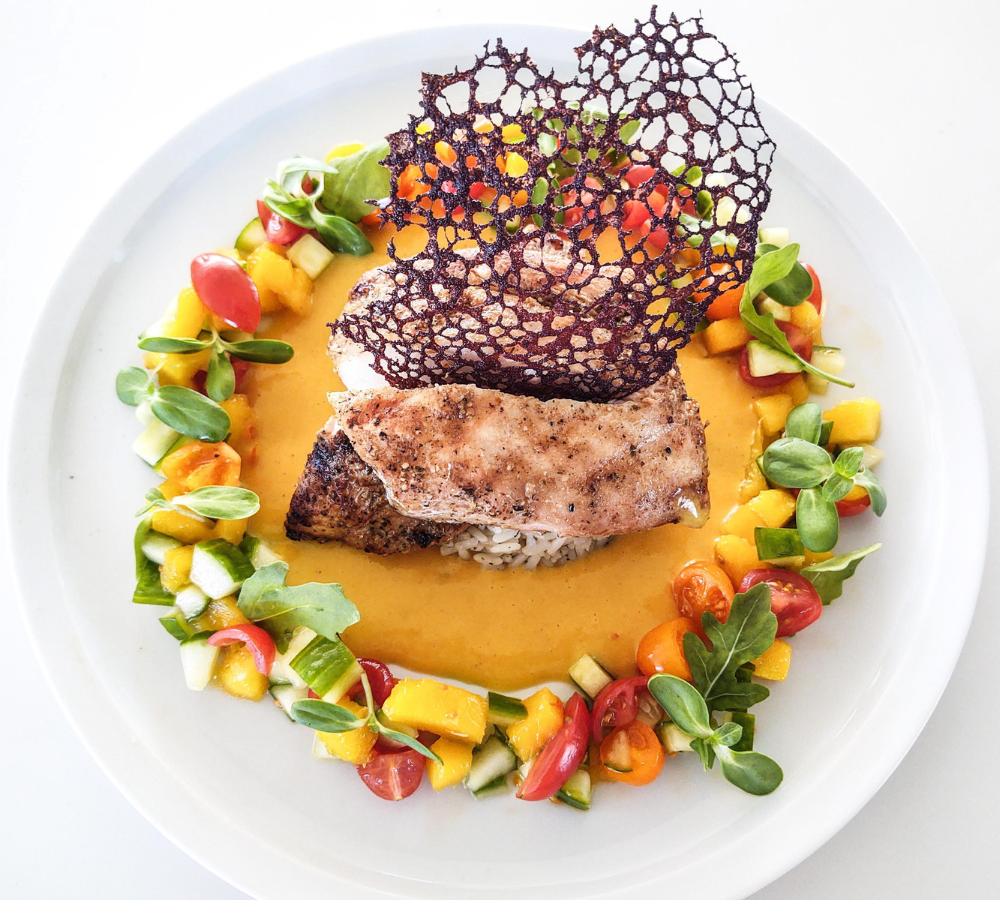
Tropical Mahi - Mahi (1-6)
Now, this recipe might seem like a little bit more effort than my usual recipes l post, but even with four elements to this one dish, there is minimal hands-on time, and everything, besides the fish, can be prepared ahead of time and heated up just before serving.
1. Mango Salsa:
Serves 6
- 2 cups diced fresh or canned mango
- ¾ cup diced red onion
- ¼ - 1 finely chopped jalapeno, depending on your spice level
- 1 cup diced tomato
- 1 cup diced cucumber
- ¼ chopped fresh cilantro
- 1 tsp salt
- Drizzle of olive oil
- ½ fresh squeezed lime
- ½ fresh squeezed lemon
Method
Combine all ingredients in a resealable container. Adjust salt, lime and lemon juice to taste and refrigerate until ready to use.
2. Caribbean Mahi- Mahi
- 6 Mahi -Mahi fillets
- Jerk seasoning
- EVOO
Method
Remove the Mahi from the fridge and let it come to room temperature before cooking. Pat dry with a paper towel and drizzle with EVOO, and generously season with jerk spice.
Drizzle some oil in a large frying pan over medium-high heat. Pan-fry the Mahi for about 5-7 minutes per side until the fish is white and flakey. Give them a generous squeeze of fresh lime juice just before they are done.
3. Coral Tulle Decoration
- 160ml water
- 1 heaping Tbsp flour
- Food coloring of choice
- Vegetable oil for frying
Method
Mix all ingredients together, besides the oil, in a small bowl. Heat a nonstick pan over medium heat and add a generous amount of vegetable oil. This is going to be a bit messy, and I highly recommend using a splatter guard if you have one. As I am sure we all know, what happens when you mix water with hot oil, so just be careful when pouring the mixture into the pan as it will splatter! Add just enough to thinly cover the bottom of the pan. Immediately turn the heat down to low.
The mixture will look thick and solid at first, but it will start bubbling and turning into a thin crispy lacey texture in a couple of minutes. You will know that your edible coral decoration is ready once the oil stops bubbling around it.
Using a spatula, carefully remove the coral from the pan and place on a paper towel to dry. Repeat with the remaining mixture.
These can also be prepared a day or two in advance and kept in an airtight container for about 5 days.
4. Coconut Lime Rice
Serves 6
- 2 cups Jasmin rice
- 2 Tbsp butter
- 1 ½ cup water
- 2 cups canned coconut milk, full fat
- 2 limes, zest and juice
- ½ tsp salt
- 4 -6 Tbsp fresh chopped cilantro
Method
Heat a saucepan over medium heat. Add butter and then add the rice and stir to coat in the melted butter. Cook for 2 to 3 minutes to toast. Add the water, coconut milk, lime zest, and salt. Stir to combine.
Bring to a simmer, cover and reduce heat to medium-low. Cook for 12 to 15 minutes until the liquid is absorbed and the rice is tender. Add the lime juice and cilantro. Toss to combine and fluff with a fork. Keep warm until ready to serve.
5. Coconut Curry Sauce
Serves 6
- 2 Tbsp butter
- 1 cup coconut milk
- 1 Tbsp apricot jam
- ½ a shallot finely chopped
- 2 tsp curry powder
- ½ tsp turmeric
- 1 tsp Better than Bullion chicken stock or powder chicken stock cube
Method
In a saucepan over medium, melt butter and fry the finely chopped shallot until soft and fragrant. Add the curry powder and turmeric and fry for a minute, stirring constantly. Add the chicken stock, coconut milk and apricot jam. Stir to combine and cook until slightly reduced.
Pour mixture into a blender and blend until completely smooth. Return to the stove and reduce until slightly thickened and glossy. Taste and adjust salt as needed. Keep warm until ready to serve.
6. Assembling the Tropical Mahi
To assemble this simple showstopper, take 6 ramekins or small dishes and fill with rice. Making sure to compact the rice tightly. Invert each ramekin into the center of a plate. Spoon some of the mango salsa around the edge of the plate.
Gently spoon the mango curry sauce around the rice, and top with your juicy sizzling piece of Mahi Mahi. Break of a piece from your coral tulle and place on top of the Mahi. And there you go, you are ready to wow your dinner party guests with minimum effort and maximum flavor!
.png?width=1000&height=900&name=mai%20mai%20(1).png)
Flourless Hazelnut Chocolate Torte
You would not believe how utterly rich, decadent and gooey this simple cake is! It’s more like a super fudgy brownie than a cake, and it's naturally completely gluten-free! You can also add any filling options besides just hazelnuts that you prefer, like walnuts, raisins, almonds or whatever you have in your pantry, or simply leave it plain.
I prefer to refrigerate mine overnight before serving, as it makes it even more like a fudge cake and sets it up nice and firm, but there is absolutely no reason not to serve it warm and strait out of the oven either.
Serves 8
- 9 oz good quality dark or semi-sweet chocolate
- 9 oz unsalted butter
- 1 ½ cups granulated sugar
- 7 large eggs at room temperature
- 1 tsp vanilla extract
- ½ cup finely chopped hazelnuts
- Shot of espresso or a few tablespoons of dark rum, optional
- Powdered sugar for dusting
- 2 cups chocolate chips
Method
Preheat oven to 375 F. Grease and line a 9-inch cake or spring form pan. In a medium size pot over low heat, melt the butter, chocolate and sugar until almost completely melted. Remove from the heat and stir until completely melted; let cool for a couple of minutes. using a whisk, quickly beat in one egg at a time until all of the eggs are fully incorporated, and the batter is thick and glossy. Add vanilla, nuts and espresso or rum if using.
Pour batter into the prepared pan. Bake for 40 to 45 min until a knife inserted near the edge, comes out clean. The torte should still have a little bit of a jiggle in the middle. Remove from the oven and let cool completely before serving.
While the torte is baking, add one cup of chocolate chips to a microwave-safe dish. Microwave on low in 30 to 60-second intervals, stirring in between until melted and glossy. Add the rest of the chocolate chips and stir until melted and glossy.
Spread out a piece of parchment paper on the counter, and make sure this will fit in your fridge. Using the back of a spoon, make long equal chocolate smears across the parchment paper. Don’t make these too thin, as they will crumble when you remove them from the parchment paper later.
Place the chocolate smears in the fridge or freezer until set. You can make these days in advance and keep them in an airtight container in the fridge almost indefinitely.
I like to bake mine the day before and refrigerate it overnight before serving, but it’s completely fine if you can’t wait that long! Serve with whipped cream, chocolate garnish, berries and a dusting of powdered sugar, or whatever your heart desires!
Let us know what you will be feasting on this Holiday Season and how you will be cruising into the New Year in the comments below!